


If you’ve ever strolled through the vibrant streets of Mumbai or Delhi, you’ve likely been drawn in by the irresistible aroma of tawa sandwiches sizzling on a hot griddle. These sandwiches—crispy on the outside, stuffed with spicy veggies, cheese, and tangy chutneys—are a street-food staple, loved for their bold flavors and toasty goodness.
The secret behind their unmistakable taste? It’s not just the chutney or stuffing—it’s the tawa they’re cooked on. And there’s no better way to recreate this experience at home than with a cast iron tawa, known for its superior heat retention and perfect charring effect. Here's how to master street-style tawa sandwiches using a cast iron tawa.
Table of Contents
Why Use a Cast Iron Tawa for Tawa Sandwiches?
A cast iron tawa mimics the flat griddles used by street vendors. It offers:
- Even heat distribution for uniformly toasted sandwiches
- High heat retention for a crisp outer crust
- Naturally non-stick surface when well-seasoned
- Perfect searing ability for that authentic charred flavor
These properties make it perfect for replicating the intense, layered flavors of roadside sandwiches at home.
Ingredients You’ll Need for Tawa Sandwiches
-
Bread slices (white or multigrain)
-
Green chutney (coriander + mint)
-
Boiled and sliced potatoes
-
Sliced tomatoes, onions, capsicum
-
Grated cheese or cheese slices
-
Chaat masala, red chili powder, black salt
-
Butter or ghee (generous amount)
How to Make Street-Style Tawa Sandwiches on a Cast Iron Tawa
1. Preheat the Tawa
Start by placing your cast iron tawa on medium flame and allow it to heat for 3–4 minutes. A hot tawa ensures even browning and crispiness.
Tip: Sprinkle a few drops of water to test heat readiness—they should sizzle instantly.
2. Assemble the Sandwich
Take two slices of bread. Spread butter on both sides and a generous layer of green chutney on the inside. Layer with:
-
Boiled potato slices
-
Sliced onions, tomatoes, capsicum
-
Cheese slice or grated cheese
-
Sprinkle chaat masala and red chili powder
Cover with the second slice and press gently.
3. Butter the Tawa Generously
Add a spoonful of butter or ghee onto the hot cast iron tawa and spread it around. The high heat combined with the butter will create that signature smoky crust.
4. Toast the Sandwich
Place your sandwich on the tawa and press it down lightly with a flat spatula or steel plate. Let it cook for 2–3 minutes on each side, or until golden brown and crispy.
For a true street-style finish, you can even place a heavy utensil on top while toasting—this helps press and compact the sandwich just like the vendors do!
5. Flip and Repeat
Flip the sandwich and add more butter if needed. Keep pressing to get that slightly crunchy, charred exterior.
6. Optional Masala Tawa Drizzle
Once the sandwich is almost ready, sprinkle a tiny bit of chaat masala and red chili powder directly on the tawa and flip the sandwich over it quickly for an added burst of masala flavor.
7. Serve Hot
Remove from tawa and cut diagonally. Serve with more chutney, ketchup, or a spicy schezwan dip.
Pro Tips for the Best Tawa Sandwich
- Use medium flame to avoid burning the bread before the insides are warm.
- Always use generous butter—it adds richness and gives the sandwich its signature golden crust.
- Keep a well-seasoned cast iron tawa to ensure a non-stick cooking surface.
- Add a sprinkle of chaat masala or pav bhaji masala at the end for that authentic street flair.
Cleaning and Caring for Your Cast Iron Tawa
After cooking, let the tawa cool down slightly. Wipe off food bits with a paper towel. Rinse with warm water (no soap), dry immediately, and apply a light coat of oil before storing to maintain the seasoning.
Conclusion
Preparing street-style tawa sandwiches at home has never been easier or more fun—especially when you have a cast iron tawa that delivers restaurant-level results. With crispy edges, gooey cheese, and bold masala flavors, these sandwiches are the perfect indulgence for weekend brunches, evening snacks, or even late-night cravings.
So heat up your cast iron tawa, stack your favorite fillings, and flip your way to sandwich perfection—Mumbai style!
MORE FROM BLOG
Top Collections

How to Use a Cast Iron Tawa for Making Soft and Fluffy Chapatis
2 Items
How to Use a Cast Iron Tawa for Perfectly Layered Parathas
2 Items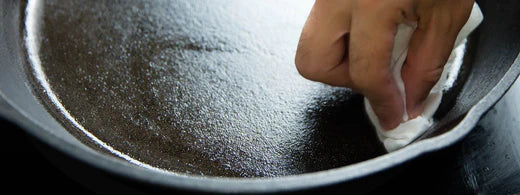
How to wash, season, and maintain Cast Iron Cookware?
2 Items
Is Cast Iron Cookware Good Or Bad?
2 Items


Leave a comment